Computer Vision
Introduction
You can use the Computer Vision capabilities of our platform to ensure every part of the UI is tested.
If something changes on the screen, you will be alerted in the test results.
This method is also known as Visual Testing or Screenshot Comparison.
You can visually verify your entire page or only certain elements.
Guide
You can use one of these 3 options:
- Page Matches Screenshot
- Full Page Matches Screenshot
- Element Matches Screenshot
The difference between Page Matches Screenshot and Full Page Matches Screenshot is that the first option refers to the viewport, while the second option refers to entire DOM.
You can find those options in the Add Assertion and Start If Statement actions.
You must provide a Baseline Screenshot URL for those options.
How to obtain a Baseline Screenshot URL:
- Add a
Take Screenshot,Snipping ToolorGenerate Full Page Screenshotstep in your test. - Execute the test.
- Get the URL of the screenshot from the Results section.
If the screenshots have different sizes, the larger one will be automatically resized to match the smaller one.
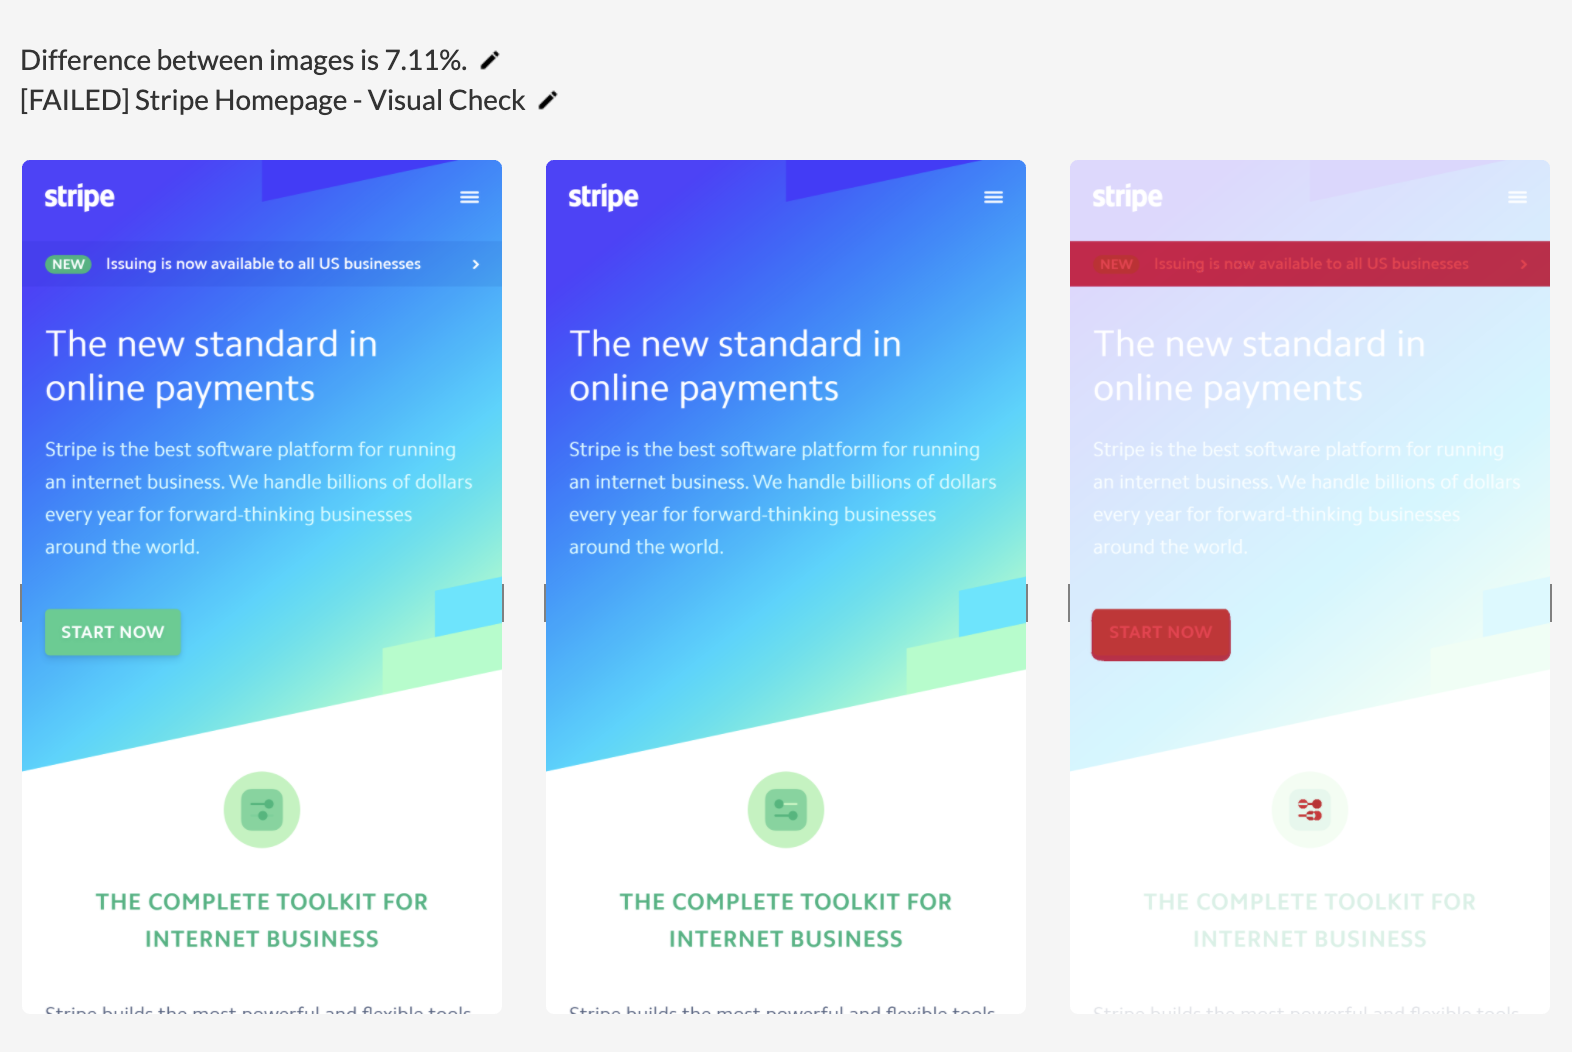
The logs will display the baseline screenshot, the current screenshot and a third screenshot that highlights the visual differences:
Each Computer Vision step will also have an
Accept New Baselinebutton in the Results section. That action will update the Baseline Screenshot from that step with the Current Screenshot.
What is the Screenshot Tolerance?
The Screenshot Tolerance (%) from the Advanced Settings can be configured to manage the relationship between the percentage result and the assertion result.
For example, if you select 5%, your assertion will fail if the difference between the screenshots is more than 5%.
The Screenshot Tolerance (%) doesn't influence the precision of the screenshot comparison and the percentage result.
It only determines the percentage at which the assertion will be marked as Passed or Failed.
What is the Screenshot Fuzz?
The Screenshot Fuzz (%) from the Advanced Settings can be configured to set the precision of the screenshot comparison.
A smaller value will lead to a more precise screenshot comparison.
A higher value will lead to a less precise screenshot comparison.
An optimal value for the Screenshot Fuzz (%) is somewhere between 2% and 20%, but you can select values between 1% and 50%.
The Full Page Screenshot option is only available for Web Tests.
Since the webdrivers only allow you to take a screenshot of the visible viewport, the Full Page Screenshots are generated by taking multiple screenshots and stitching them together.
This may cause some elements with the CSS property position: fixed to be displayed multiple times.
If you're testing in multiple browsers and resolutions, we recommend having baseline screenshots for each combination.
You can manage those combinations by using If Statements and System Variables.